Creating A Static HTML Blog Deployed with CI/CD
Written on
In thinking about creating and maintaining this blog I had a few requirements to keep it simple, learn a few things along the way and hopefully work on my goal of coding more this year.
You can find the an example git repistory here to start with.
Requirements
- Keep it as simple as possible with mostly static HTML, no CMS, relational database etc required
- Ensure the content is parsable so I can process it, manipulate it and/or move it if I decide in the future
- 100% maintained in git
- Use Python
- Tested and deployed with CI/CD
I plugged these requirements into ChatGPT and it recommended Pelican as good Python based static site generator with a bit of a git workflow. This gave me enough threads to pull on to land on some good tools.
Tools
- Pelican: After playing around with Pelican a bit it proved to be simple, and flexible enough. I started with the Cid theme and customized it as I went.
- Gitlab: I choose a free Gitlab account over GitHub just because we're currently using it at work and I want to take some of my learnings back to my day job.
Creating and Deploying Content
The Pelican quickstart tutorial was enough to learn the basics of configuring a site and writing a test blog posting. It really is a simple but powerful tool.
Start with a simple pelican site in a Python venv
% mkdir my-blog
% cd my-blog
% python -m venv venv
% source venv/bin/activate
% pip install pelican markdown"
% pelican-quickstart
Welcome to pelican-quickstart v4.11.0.

This script will help you create a new Pelican-based website.

Please answer the following questions so this script can generate the files
needed by Pelican.


> Where do you want to create your new web site? [.]
> What will be the title of this web site? Your Blog Title
> Who will be the author of this web site? Keith Lawson
> What will be the default language of this web site? [en]
> Do you want to specify a URL prefix? e.g., https://example.com   (Y/n)
> What is your URL prefix? (see above example; no trailing slash) https://keithlawson.me
> Do you want to enable article pagination? (Y/n) y
> How many articles per page do you want? [10]
> What is your time zone? [Europe/Rome] America/New_York
> Do you want to generate a tasks.py/Makefile to automate generation and publishing? (Y/n)
> Do you want to upload your website using FTP? (y/N) n
> Do you want to upload your website using SSH? (y/N) n
> Do you want to upload your website using Dropbox? (y/N) n
> Do you want to upload your website using S3? (y/N) n
> Do you want to upload your website using Rackspace Cloud Files? (y/N) n
> Do you want to upload your website using GitHub Pages? (y/N) n
Done. Your new project is available at /Users/username/code/my-blog-public
Create a Posting
Create a test post "content/testpost.md"
Title: Test Post
Date: 2025-01-01
Category: Test

Hello world!
Test generating HTML
% pelican content
Done: Processed 1 article, 0 drafts, 0 hidden articles, 0 pages, 0 hidden pages and 0 draft pages in 0.14 seconds.
% ls -l output
total 48
-rw-r--r--@ 1 keith  staff  2953 28 Mar 06:43 archives.html
drwxr-xr-x@ 3 keith  staff    96 28 Mar 06:42 author
-rw-r--r--@ 1 keith  staff  2934 28 Mar 06:43 authors.html
-rw-r--r--@ 1 keith  staff  2927 28 Mar 06:43 categories.html
drwxr-xr-x@ 3 keith  staff    96 28 Mar 06:42 category
-rw-r--r--@ 1 keith  staff  3438 28 Mar 06:43 index.html
-rw-r--r--@ 1 keith  staff  2847 28 Mar 06:43 tags.html
-rw-r--r--@ 1 keith  staff  3592 28 Mar 06:43 test-post.html
drwxr-xr-x@ 4 keith  staff   128 28 Mar 06:42 theme
That's really enough to get a basic site up and running.
Git repository
Since we're going to build and deploy through CI/CD the repository just has to have the markdown source.
Create your .gitignore
# Ignore Pelican's output folder
/output/

# Ignore Python bytecode files
*.pyc
__pycache__/

# Ignore logs and databases
*.log
*.db

# Ignore virtual environment (if you're using one)
venv/
keith@lappy my-blog % cat .gitignore
# Ignore Pelican's output folder
/output/

# Ignore Python bytecode files
*.pyc
__pycache__/

# Ignore logs and databases
*.log
*.db

# Ignore virtual environment (if you're using one)
Initialize repo and commit your test posting.
% git init && git add . && git commit -a
I'll leave out the steps of creating the gitlab repository and pushing the repo up so next steps assume you have your repository in a private gitlab repo.
CI Deployment
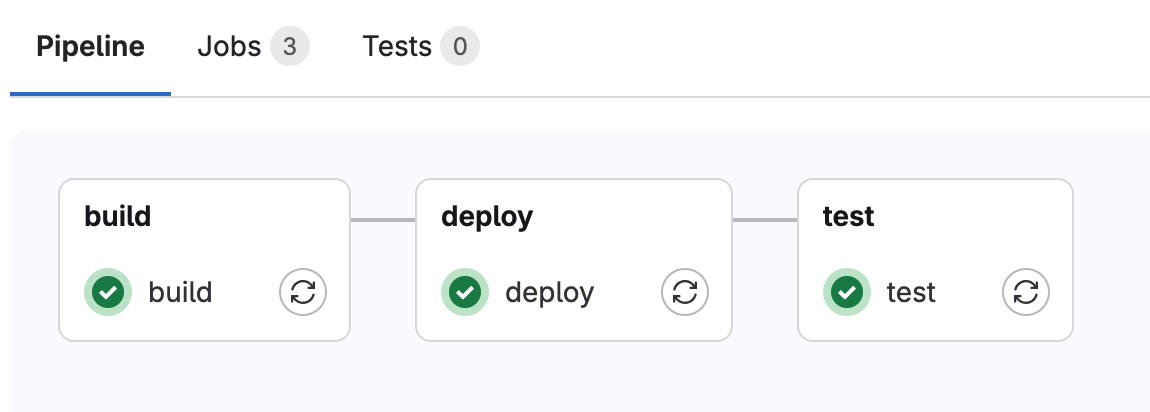
Create your ".gitlab-ci.yml" in the root of the repository. This configuration spins up a Docker container, runs Pelican to generate the content, rsyncs it to the server your site is hosted on and then runs a broken link checker across the published site.
image: python:3.11

stages:
  - build
  - deploy
  - test

variables:
  REMOTE_USER: "ssh_username"
  REMOTE_HOST: "server.example.com"
  REMOTE_PATH: "/home/ssh_user/myblog"
  PYTHON_VENV: "/home/ssh_user/myblog/venv/bin/activate"

before_script:
  - python -m pip install --upgrade pip
  - pip install -r requirements.txt

build:
  stage: build
  script:
    - pelican content -o output -s pelicanconf.py
  artifacts:
    paths:
      - output

deploy:
  stage: deploy
  before_script:
    - apt-get update -qq && apt-get install -y rsync openssh-client
    - mkdir -p ~/.ssh
    - echo "$SSH_PRIVATE_KEY" | tr -d '\r' > ~/.ssh/id_ed25519
    - chmod 600 ~/.ssh/id_ed25519
    - eval "$(ssh-agent -s)"
    - ssh-keyscan -H $REMOTE_HOST > ~/.ssh/known_hosts
    - chmod 644 ~/.ssh/known_hosts
    - ssh-add ~/.ssh/id_ed25519
  script:
    - rsync -avz --delete output/ $REMOTE_USER@$REMOTE_HOST:$REMOTE_PATH
  only:
    - main  # Adjust based on your branch

test:
  stage: test
  script:
    - pip install linkchecker
    - linkchecker --ignore-url="mailto:" --check-extern --no-warnings https://keithlawson.me
  only:
    - main
Add your private key to the environment variables in your gitlab repo:
- Generate an SSH Key Pair (if you don’t have one already)
ssh-keygen -t rsa -b 4096 -C "gitlab-ci" -f gitlab_deploy_key
This gives you:
gitlab_deploy_key (private key)

gitlab_deploy_key.pub (public key)

⚠️ Never share the private key (gitlab_deploy_key)!
- Add the Private Key to GitLab CI/CD as a Variable
    Go into your gitlab repo.

    Navigate to:
    Settings → CI/CD → Variables

    Click "Add variable".

        Key: SSH_PRIVATE_KEY

        Value: (paste the contents of gitlab_deploy_key)

        ✅ Mark as Protected and Masked

        🔒 Optional: Set scope to only environments where you need it
That's it! Use a standard git workflow create new content in content/posting.md, commit and push. Your Gitlab CI job will kick off, generate the Pelican content, deploy to your web server with rsync over SSH and test for broken links.